You can add or remove columns in some folders and views, such as the Inbox and other Mail folders, contact lists, or task lists.
Important: In order to use these instructions, you have to switch to a view other than the default view.
Change your view to show columns
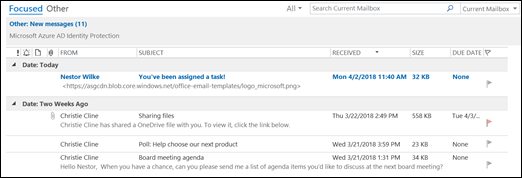
In order to add and remove columns, you must use a list view. The default view for the Inbox is Compact, showing messages grouped by conversation.
To switch your view to a list view:
-
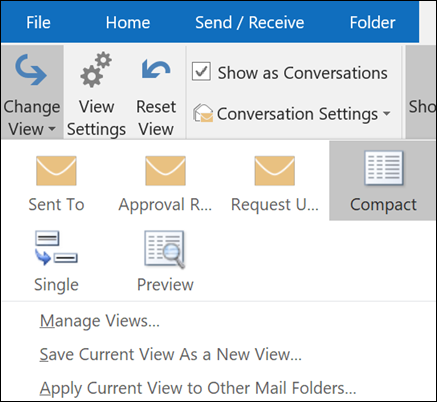
Select the View menu, then Change View.
-
Select Single or Preview.
Add or remove columns in a list view
-
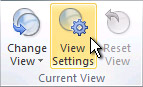
On the View tab, in the Current View group, click View Settings.
-
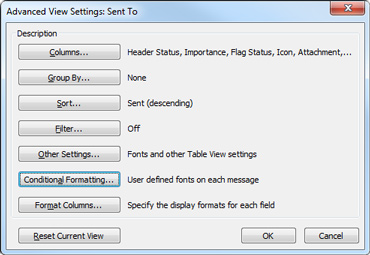
In the Advanced View Settings dialog box, click Columns.
-
In the Show Columns dialog box, in the Available columns list, click a column name, and then click Add.
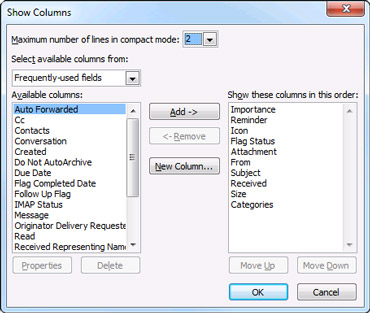
If the column that you want is not in the Available columns list, click the Select available columns from box to see additional sets of columns.To create a custom column, click New Column, enter a Name for the column, and then click the Type and Format of information that you want the column to display.
To remove a column, in the Show these columns in this order list, click a column name, and then click Remove.
-
Click OK to save your changes and apply your new view.
Important: If you don't see your new column appear in your view, you probably aren't using a list view. See Change your view to show columns to switch to a list view first, then repeat the steps in this procedure.